
 From Bob Morningstar
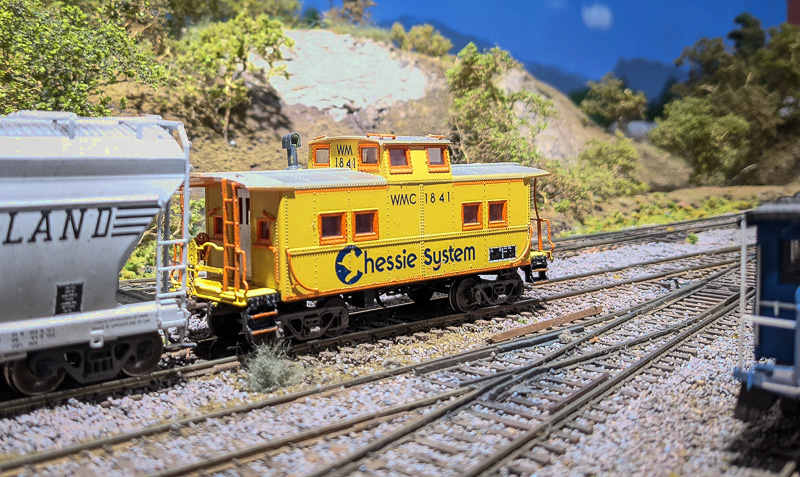
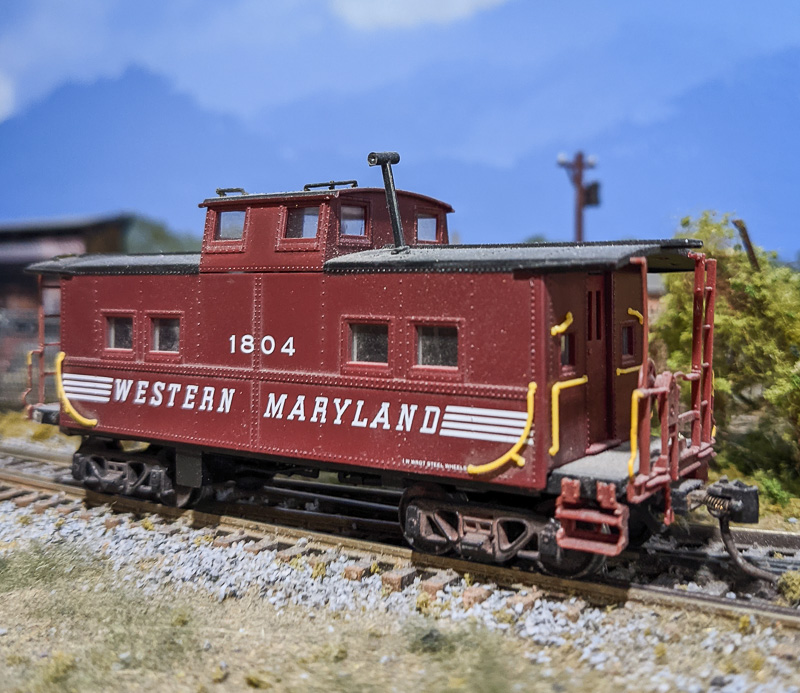
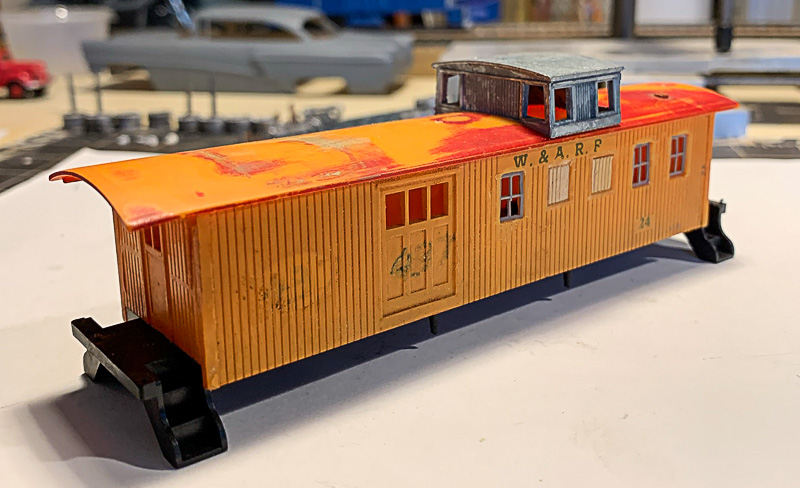
I model the waning years of the Western Maryland (WM) when the Chessie System colors were rapidly erasing any visages of the WM from the rails. The Western Maryland had 105 “Northeastern” style cabooses on the roster. A complete WM caboose roster is located at alphabetroute.com/wm/rosterpdfs/WMCabooseClass.pdf.
Lifelike produced a huge number of these caboose years ago. They are readily found at train shows and on eBay. I acquired a few of these in both the boxcar red “Speed Lettering” and “Circus Color” paint schemes, and need to bring the “Speed Lettering” cars forward, era-wise, into the 1980s.
 Starting with a Proto 2000 Steel Center Cupola Caboose I used the following material to complete this project.
- MicroScale Industries 87-700 Western Maryland Cabooses decals
- Tru-Color TCP-33 Aluminum paint
- Tru-Color TCP-305 Chessie Yellow
- Badger ModelFlex – UP Harbor Mist gray – used as a primer, use whatever primer you like best
Note: For the Vermilion sash and door trim you could use Tru-Color TCP-307 Chessie Red-Orange. I used a bottle of the actual Chessie Vermilion that was given to me decades ago by a WM shop foreman. I have carefully kept it sealed all these years and it was still usable after being thinned for the brushwork.
Note: Tru-Color paints require acetone cleanup. You may want to substitute your favorite water-based acrylic-based paints as I find that Tru-Color is difficult to airbrush and cleanup.
 Disassemble and paint-strip the caboose. 90% isopropyl alcohol in a glass jar works very well to strip paint. Let it soak overnight. Scrub with a toothbrush and let it soak another evening. After round two the paint will be gone. Wash in hot soapy water, rinse well, and let dry. All the parts stay in a project box until needed.
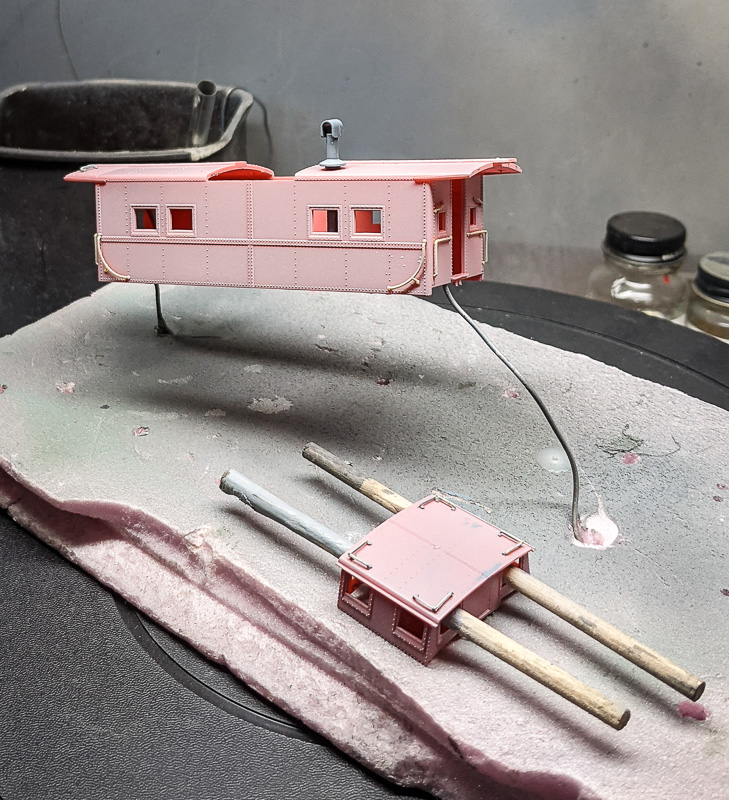 The first trip to the paint booth is for the primer. I use whatever gray I have on hand, shot through a Badger dual-action brush, and spray at about 15 psi.
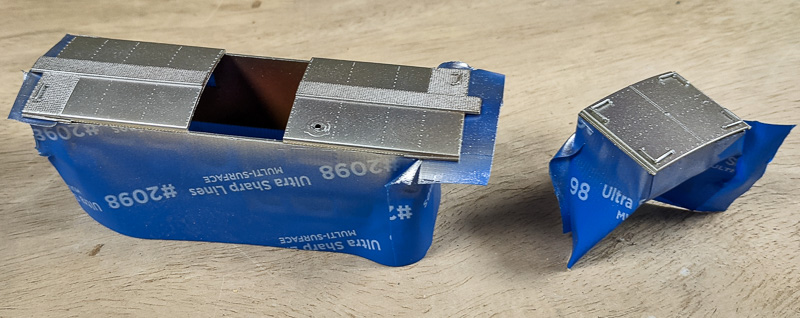 Next, mask the body and shoot the aluminum paint for the roof. 3M #2098 UltraSharp Lines Multi-Surface painters tape is my favorite masking tape. Rarely will there be paint bled-through and the edge of this tape is razor-sharp.
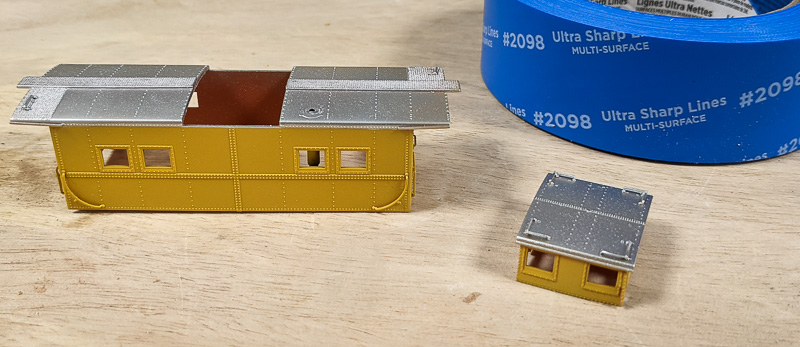 After the roof color has been applied, mask the roof and shoot the yellow next.
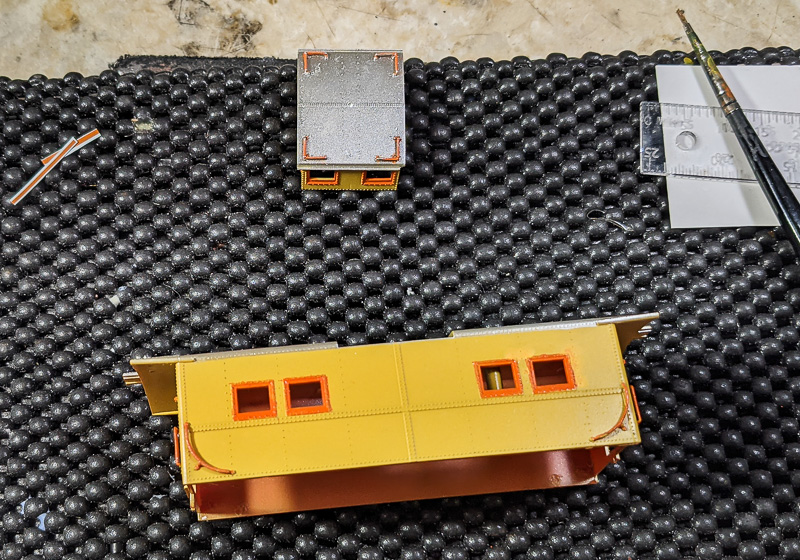 Now the tedious part comes into play, painting the window and door sashes. I use MicroScale Industries Micro Mask and a 2/0 or 0-size brush to carefully apply the Micro Mask to the body around the window sash. This is in lieu of using the 3M tape which is very time-consuming to cut and apply.
Using a 2/0 brush apply the vermilion color to the sashes and door frames. The key to a professional-looking finish is being comfortable while applying both the Micro Mask and vermilion paint. I work at a well-lit workbench, use an Opti-Visor with LED lighting, and a foam-based car cradle to hold my work. I also rest my painting arm and elbow on a soft towel so that I don’t become uncomfortable and rush the work.
 Another trip to the paint booth to shoot a gloss coat on the car, I use MicroScale Micro Gloss and thin it slightly before airbrushing. I have also had success using Pledge Liquid Floor Gloss. Thin it with water and brush it on the areas where you will be applying decals.
I consider the best book written on WM cabooses to be “Western Maryland Cabooses” by Dwight Jones. Another valuable photographic resource for these cabooses from the Chessie era can be found at hebners.net/Caboose/bowm.html.
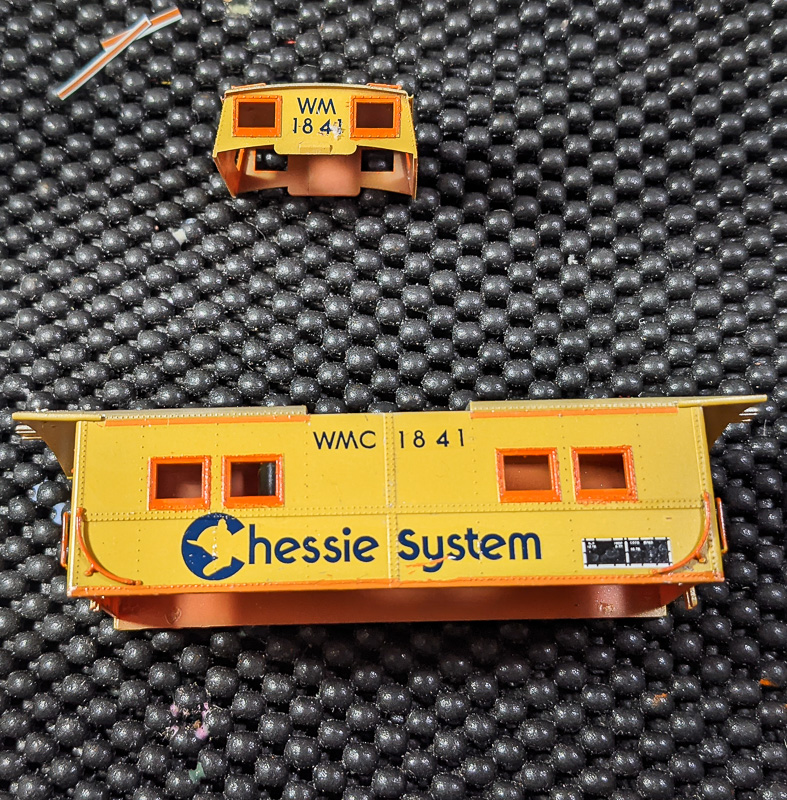
Using a prototype photo, cut the decal sheets to obtain what you need. I cut the decals as close to the artwork as possible using either a hobby knife with a fresh blade or manicure scissors. Apply the decals after letting them soak just long enough to slide off the backing paper. Position in place and let dry. After the decals are fixed in place apply your favorite decal setting solution, in my case that is slightly thinned Walthers SolvaSet. This wetting/softening solution is very aggressive and older decals may start dissolving or falling apart if you use it without thinning.
I model the early 1980’s so a Clean, Oil, Test, and Stencil (COTS) decal was applied. Notice there is no ACI label. The railroad industry gave up on the ACI car identification system in the late 1970s due to the unreliability of reading the labels and the cost involved in maintaining them.
 The end platforms were hand-painted using the Tru-Color Chessie Yellow and the end rails were done in my vermilion color.
Again, images of the ends of the car are very useful as there seems to be a wide variation as to what safety appliances (handrails, step tread edges, and grab irons) got the vermilion color depending on who did the repaint.
One last trip to the paint booth for a shot of clear flat to hide the decal edges, I use Badger ModelFlex 16-601 Clear Flat or if I want to go “old school” I’ll shoot Floquil Flat Finish.
Finishing up the model included painting the wheel faces and backs with a muddy/grime color, I use a cheap acrylic paint from Hobby Lobby made by FolkArt called #940 “Coffee Bean”. It has just the right amount of brown and dark tints that makes for a convincing wheel finish. The Kadee couplers are lightly painted with the same color using care not to gum up the workings of the knuckle.
Weathering involves using light gray, black, and brown powders that I get by shaving art pastels. I shave the individual colors into an egg container compartment. This technique has worked very well and is inexpensive compared to buying weathering powders sold for model railroad applications.
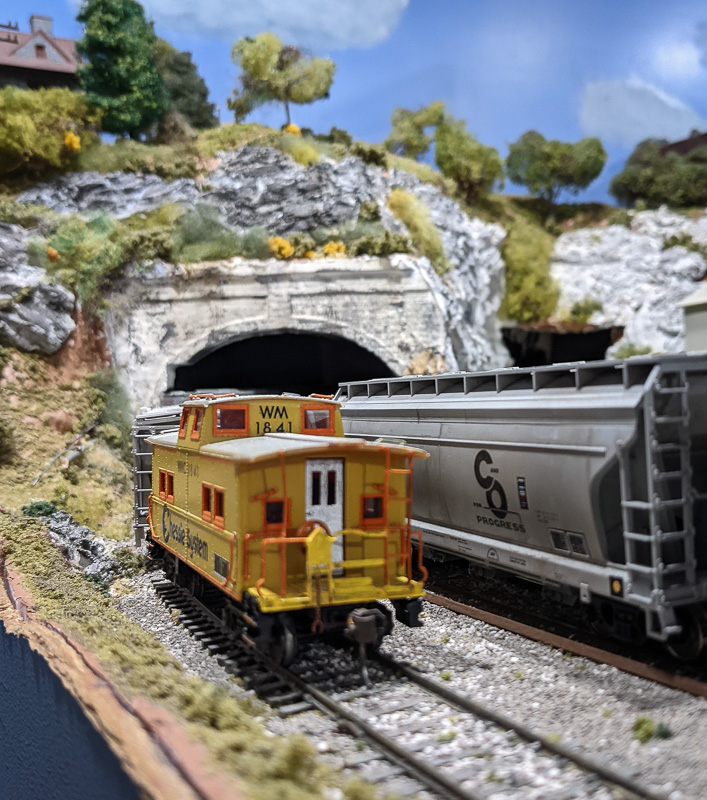
After weathering, the car is complete and ready to get back on the rails. It takes me about 4 hours in total to do one of these way cars, spread over a week of evenings. I hope you enjoyed this how-to feature and picked up an idea or two.
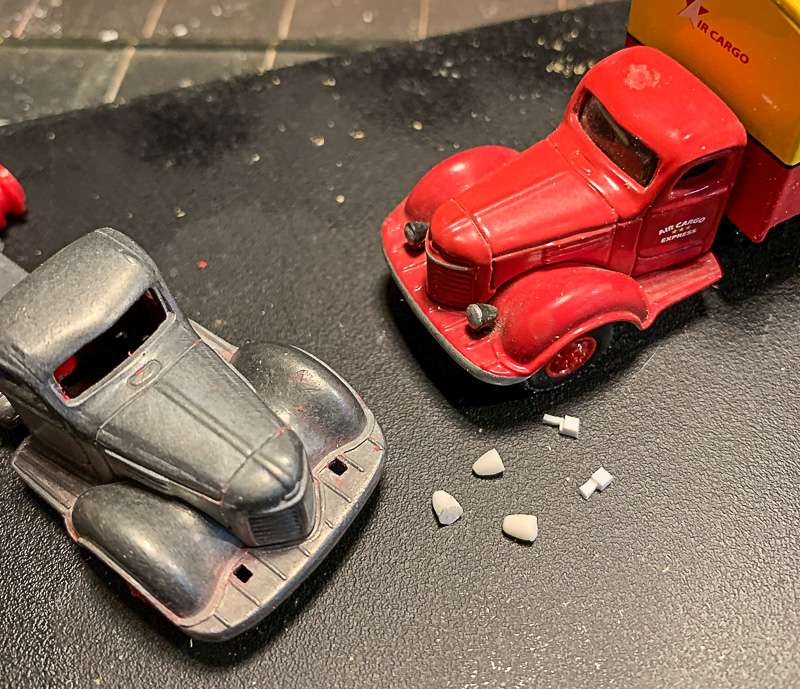
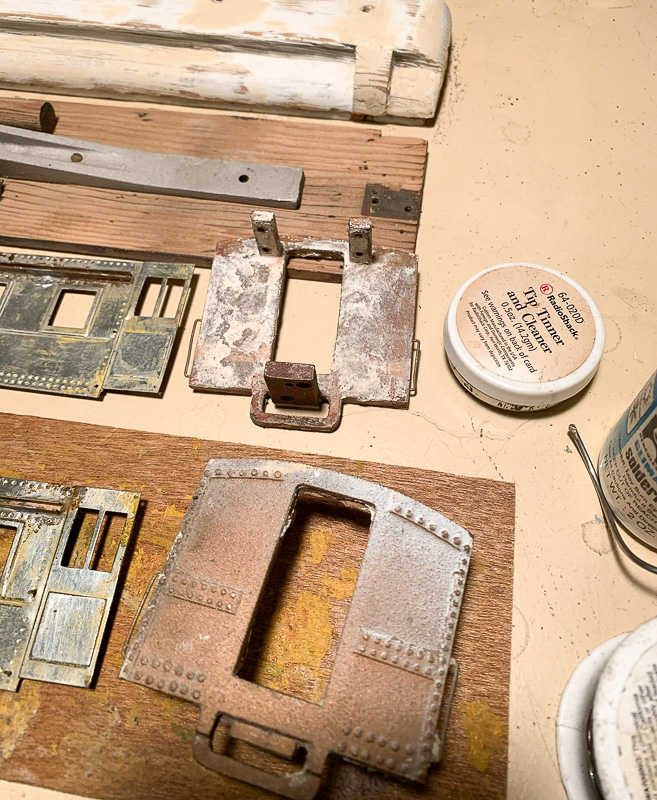
 Of the many facets of this hobby that I enjoy, one is the resurrecting of old models. “Flea Market Finds” if you will. This old 1880’s Mantua combine could have been had for perhaps 50 cents, if it wasn’t in the freebie box. It had a missing truck and the truss rods, made of steel wire for some reason, were badly rusted. The model probably dates to the 1950s and was intended to accompany Mantua’s “General ” 4-4-0 locomotive kit. I recall purchasing one of those kits at Polk’s Hobbies in Manhattan in the early ’70s for $15. Does anyone remember Polk’s? They later produced their own line of hobby goods under the Aristo-Craft name (if memory serves). The store itself offered five floors of hobby goods. Each floor was devoted to a particular specialty (plastic models, model railroading, R/C, etc).
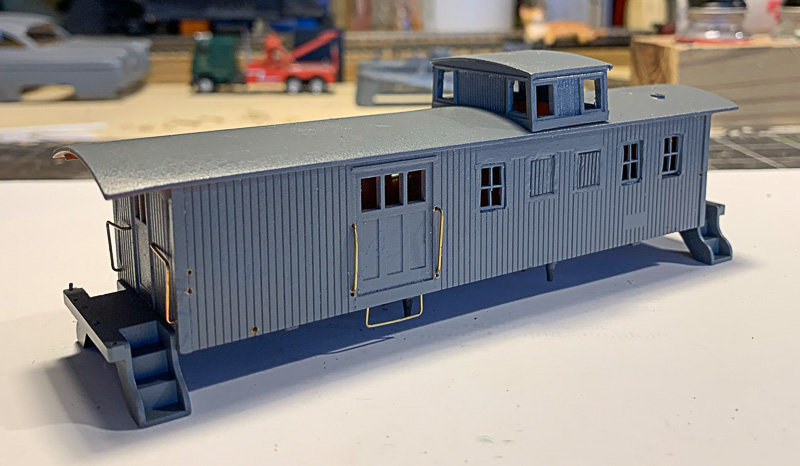 Prototype railroads often repurposed old rolling stock so I decided to do the same with this old combine. As it is now, the car is ready for detailing. The rusty truss rods have been removed, the cupola is in place, the windows beneath plugged and the grab irons are slowly being installed. Much tedious drilling ahead.
 Also on my bench are this pair of
 These passenger cars are O scale items for Jay Beckham’s railroad. Jay discovered 13 ancient
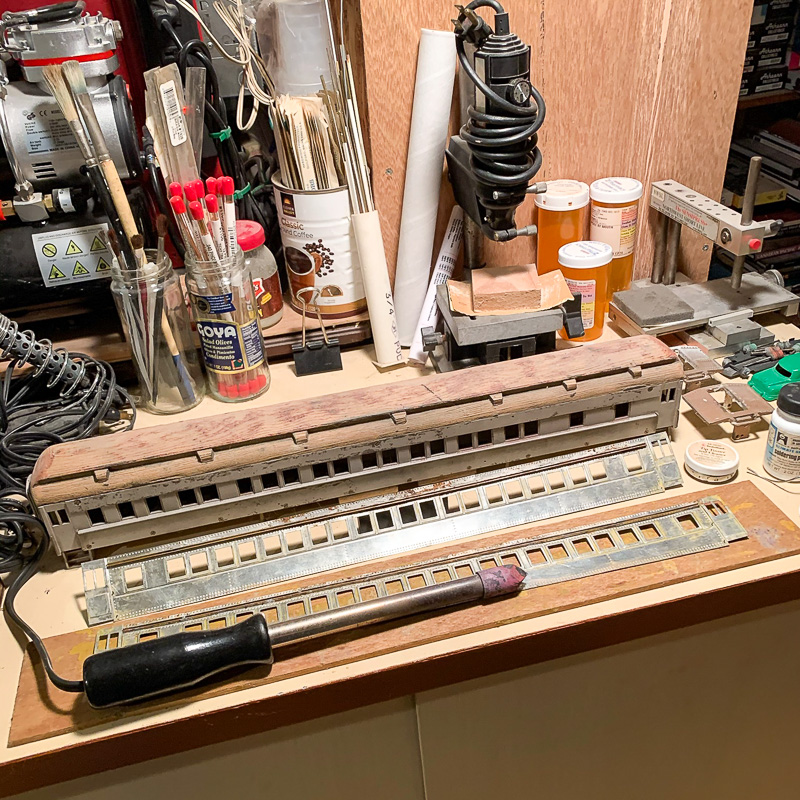
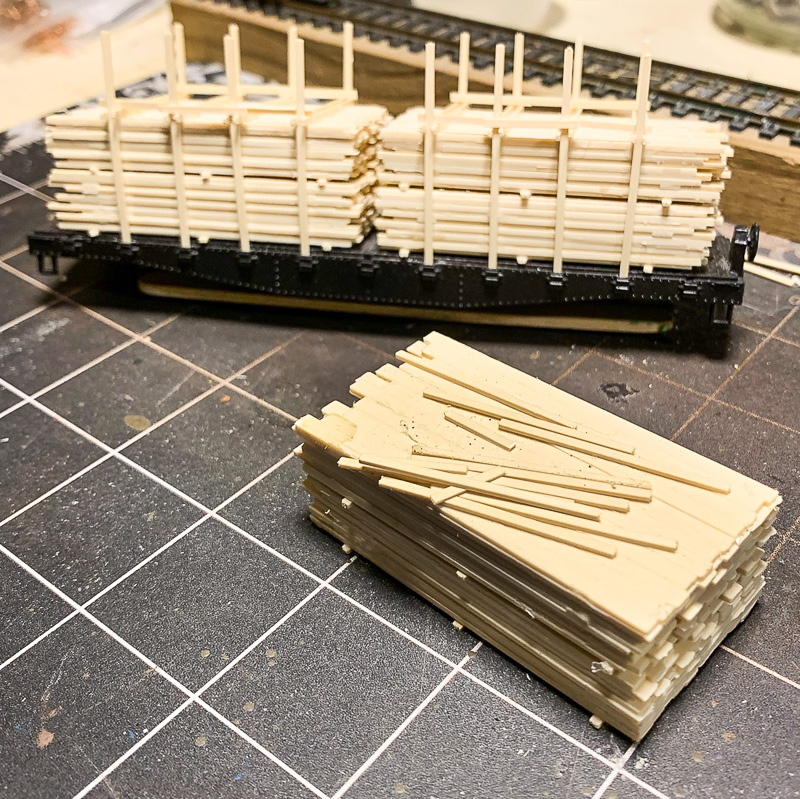 I’d always admired the open flat car lumber load as featured on
 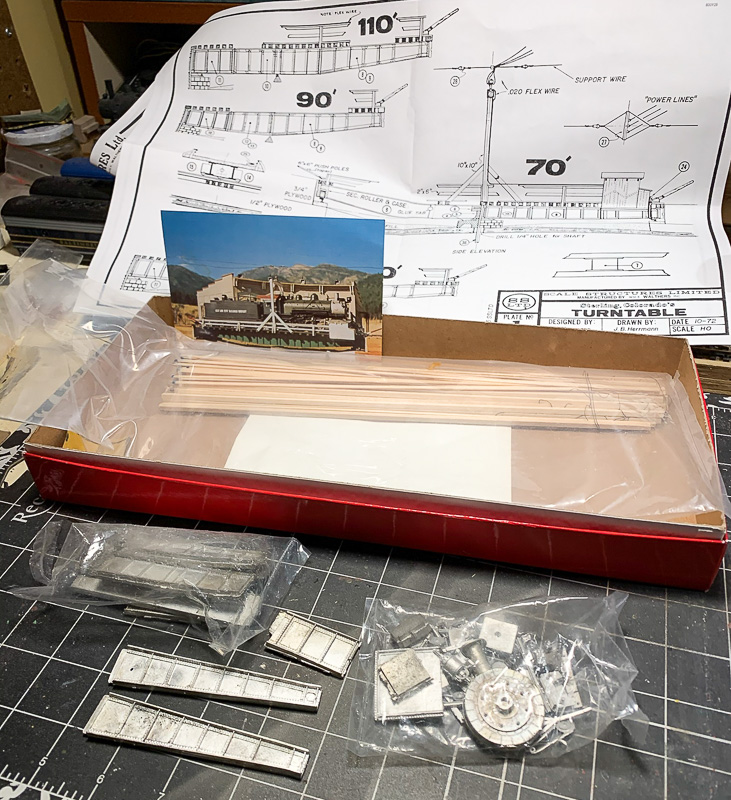 Bill Reynolds needed a turntable for turning helper engines on his last layout. I had tried to modify an Atlas turntable to do the job but the mechanism wasn’t up to the task. Bill had a kit, however, for a turntable that would be ideal for the job. Never having built a turntable before, I volunteered for the task. It appears to be an interesting kit. The pit is to be constructed of several layers of plywood. Different diameters of pit opening and thickness of wood being used to create the step for the ring rail. I haven’t begun this project yet but am looking forward to it.
 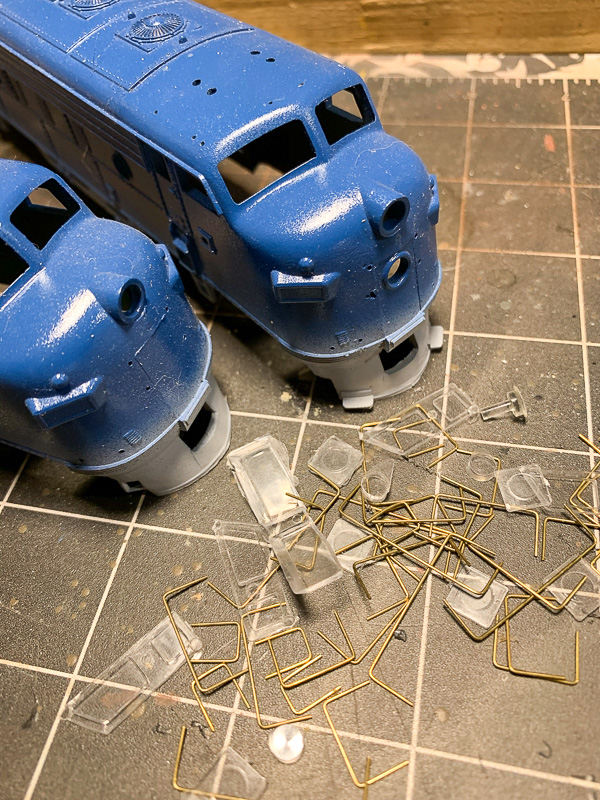 Bob Winkler has a set of locomotives he set up with a pair of old AHM FT cab unit bodies. I’m not sure what the chassis are but they run beautifully. They’ve always irritated me though as the wheelbase is wrong for the FT. To that end, I decided to fit out a pair of F7 shells to replace the FT shells. The stirrups on the pilot of one shell were broken. Rather than attempt a repair of the stirrups I thought it would be interesting to install steps on the pilot of one of the locomotives. Both will be fitted with
 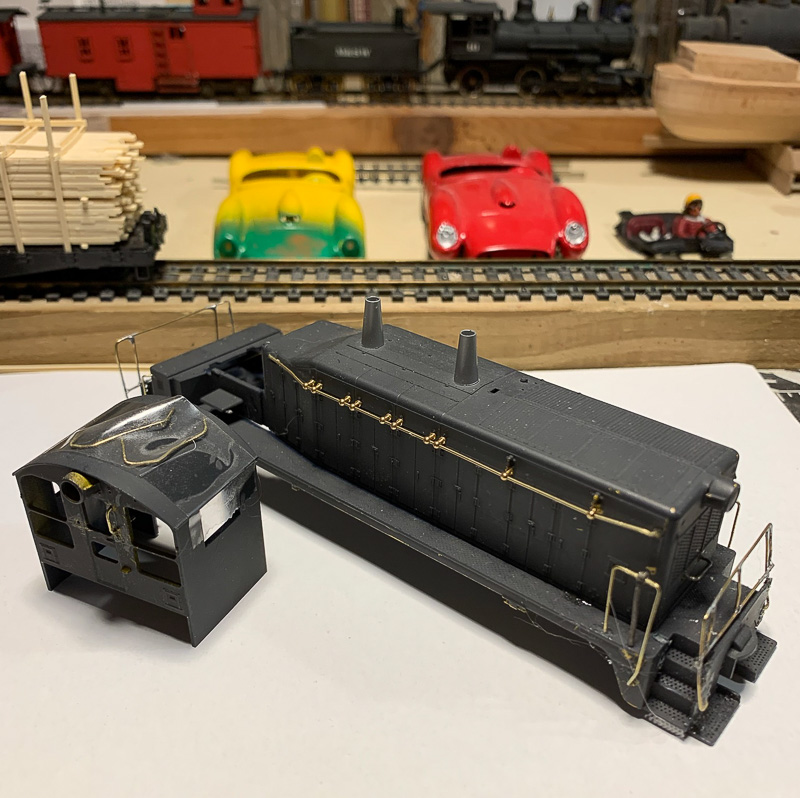 The NW-2 is another project awaiting attention in the spray booth. It will be painted and lettered for Bob Winkler’s “Central Maryland”. Bob has a thing for EMD switchers. The handrails are his handiwork and are essentially scratch built as the locomotive shell had none.
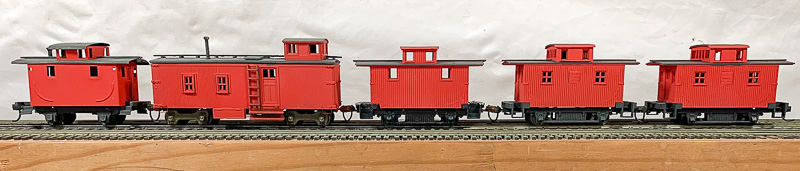 Alex has expressed interest for some time in building a layout based on a “spaghetti western” theme. Think Clint Eastwood and
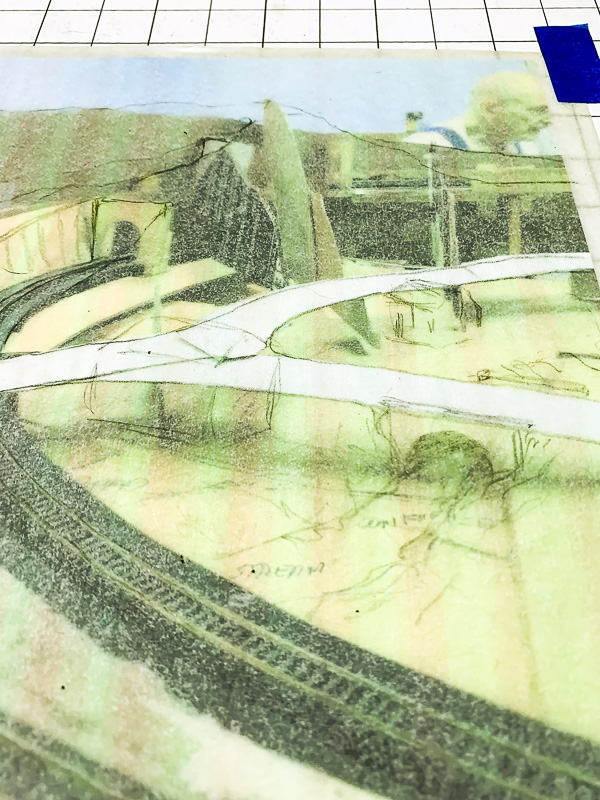
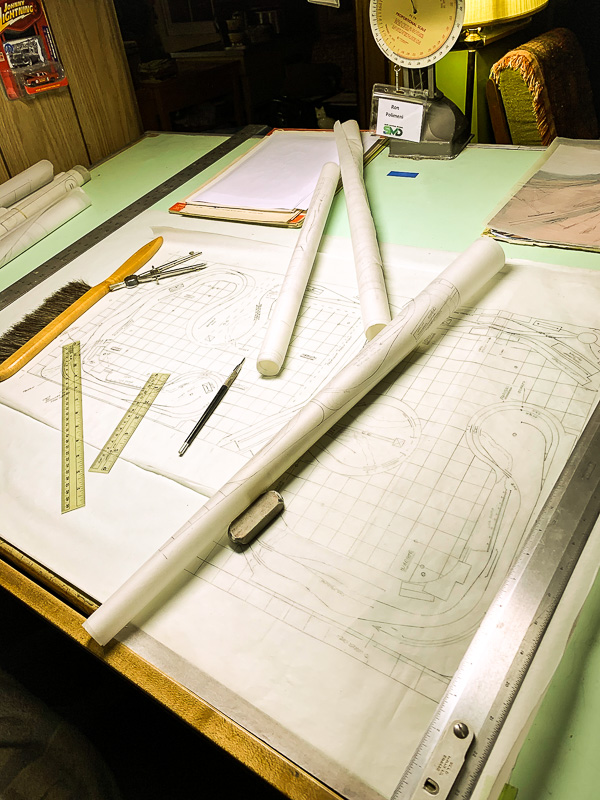 Track planning is a hobby within the hobby for me. Superintendent Jerry Skeim is in the process of constructing a large, double-deck On30 layout. Jerry and I have enjoyed working together as a crew during operating sessions. Talking trains, one thing led to another and Jerry asked if I could offer some thoughts on his project. Beware of what you ask for.