
Real Men Don’t Read NMRA’s Recommended Practices
From Jay Beckham
In 2000 I changed from HO to O scale. In HO a 36-inch minimum radius was a nice-looking curve. I figured that 50-inch would be fine for O scale, particularly since I was modeling the South Shore which was an interurban line. I also did not consider that if I found a Little Joe it would require a larger radius because of its two eight-wheel trucks. But real men don’t read NMRA’s Recommended Practices (RP).
Now, jump forward 20 years to modeling the PRR’s Northern Central branch from Baltimore to Harrisburg, and the recent purchase of two PRR EMD E8 units. These engines have all-wheel pick-ups and are close-coupled. They run poorly on my curves. Then I added some 80-foot passenger cars, and the derailing began. My disregard for radius had come back to bite me.
According to the NMRA Recommended Practices, six-wheel trucks and 80-foot cars require a 58-inch minimum radius. Due to existing constraints, I am compromising with a 60-inch minimum. The RP also recommends a #6 switch. I have dozens of Atlas #5s. Fortunately, when I built the Penn Station area, I had laid large radius curves. I did the same at the site of my northbound staging representing the New York area.
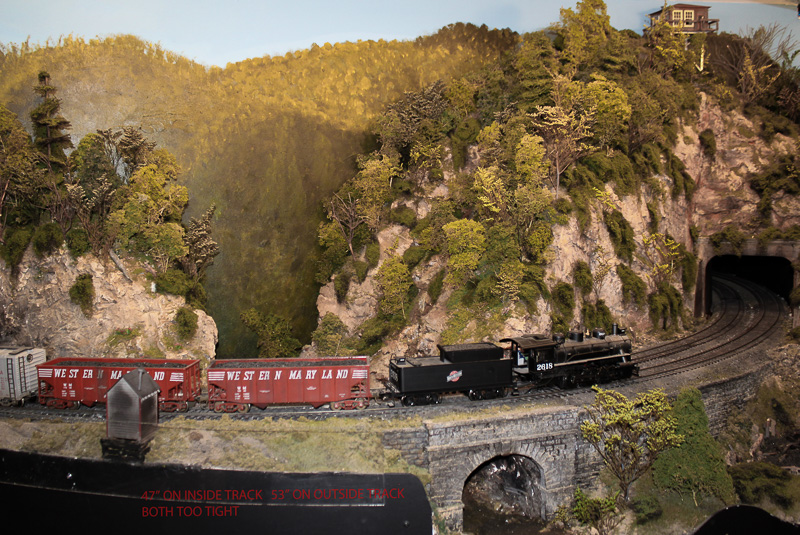 The worst area (above) is that area previously known as Warren’s Gap. The inside track was 49” radius and the outside track 53” radius. So, I removed the track and roadbed and rebuilt that area with the inside track at 60” and the outside track at 64”.
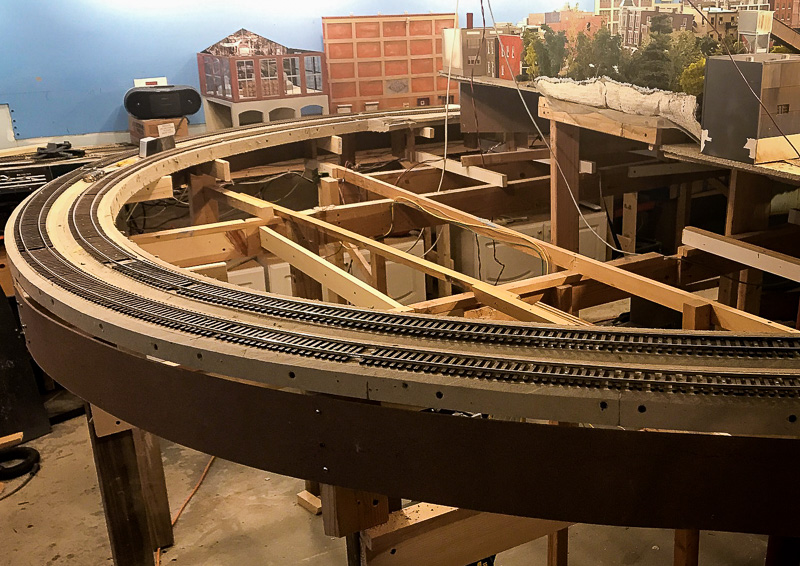 This will become New Freedom with a small town (above), a business or two, plus the PRR passenger station.
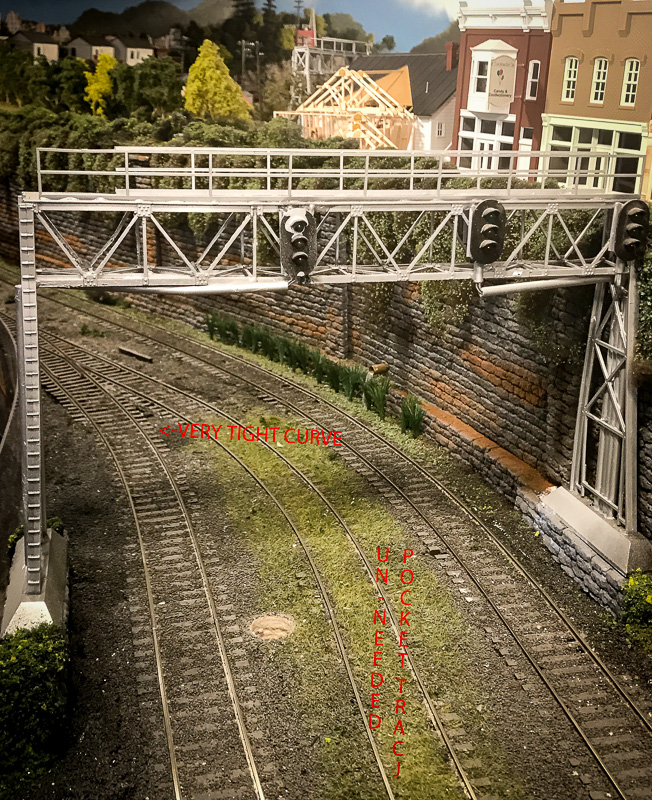 A second area (above) had a pocket track leftover from South Shore days and because of the switch and pocket track, there was an “S” curve of about 48” radius.
 I removed the switch and the pocket track (above) to eliminate that problem.
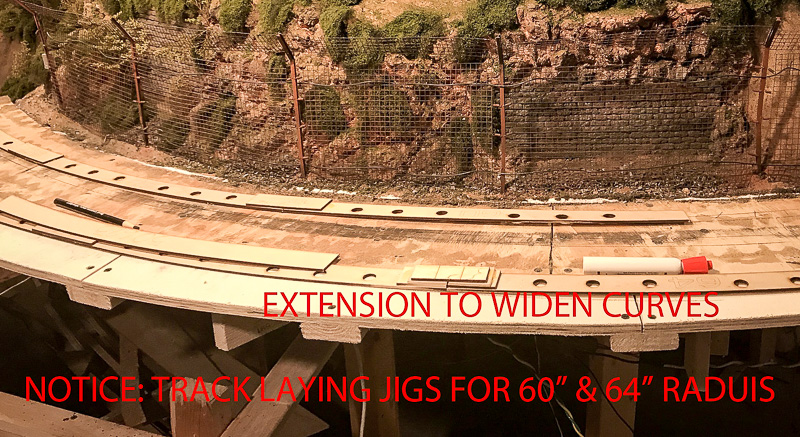
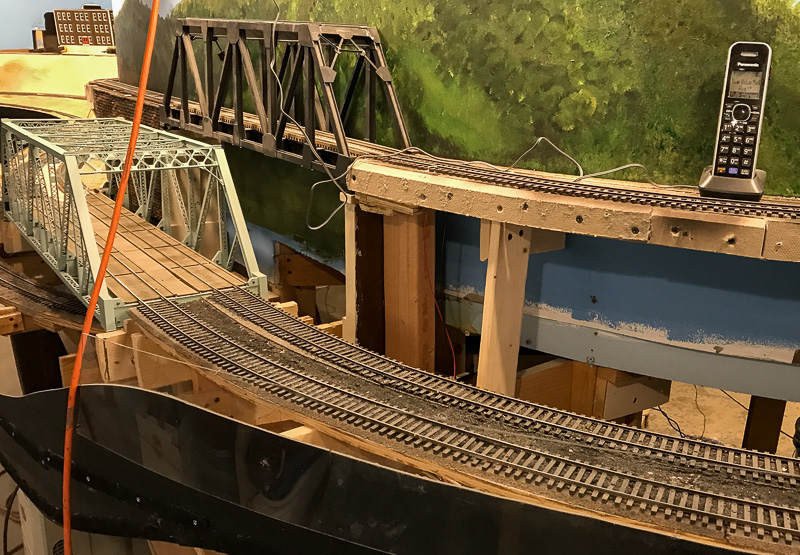 Another major area that requires widening (above) is the area entering Baltimore. It includes an Atlas double track truss bridge. The approaches to the bridge in both directions varied from 48” to 60”. I am still in the process of removing the old track and extending the benchwork (below) about 3-4 inches to allow for 60” and 64” standards.
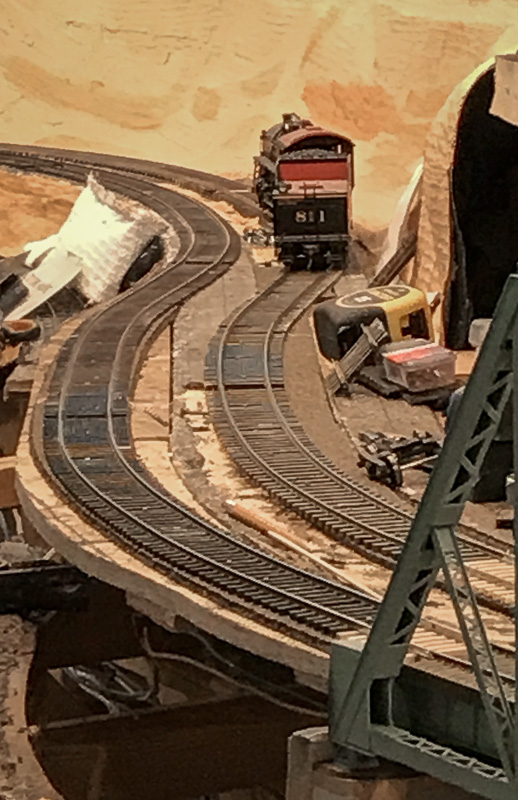 I am not sure if the bridge will still fit so the tracks at the end of the bridge (left) may need to be re-laid to 60” radius. The photo shows the tracks before being enclosed by a tunnel.
There are many more areas on the layout that may require radius corrections. They will be addressed in the coming months. I plan to build #6 switches using Fast Tracks and replace all my Atlas #5 switches. The nickel-silver plating is wearing off most of those switches anyway, and a #5 is below the recommended practices. In addition, the frogs are very difficult to solder leads to for powering.
So, what have I learned in this process? Standards and recommended practices have a purpose. My advice is to do your homework. Pay attention to what others say and have experienced. You may be able to apply their methods to your work.
After building a large layout I feel I could write a book about things to do and not to do.
Consider layout height so you can sit underneath to work on switches and wiring. Consider sectional construction so you can move without destroying years of work. Keep detailed spreadsheets of everything on the layout for the sake of your heirs. I feel I could go on and on.
Photos by Jay Beckham and Wilbur Snyder